
RenderMan Textures from Python
In order to better understand the guts of Python and RenderMan, in the past I have implemented a number of proof of concept projects extending or embedding each. Previously, I combined my efforts by embedding Python into RenderMan as an RSL shadeop so that shaders could be written in Python!
Unfortunately, that code is lost to the ages, so I decided to revisit my efforts and produce something that could actually have applications: using Python as a source of texture data for RenderMan.
(Note that I am using Pixar's RenderMan Pro Server (i.e. PRMan), and APIs specific to that product; unfortunately this does not work for any arbitrary RenderMan-compliant renderer.)
10,000ft Overview
It turns out that quickly mocking this together is pretty straight forward, as the "Getting Started" instructions for each part are quite compatible; the steps I took were generally:
-
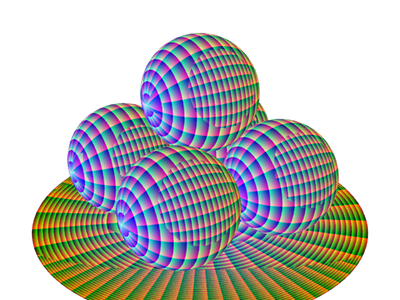
Build a basic Rtx plugin using the example as a template; see DebugRtx.cpp for my Rtx plugin which returns gradients across the requested tile. This applied to a small stack of spheres looks like:
-
Embed the Python interpreter using the docs on the subject. Just get it to print "Hello PRMan!" when the Rtx plugin is opened.
-
Using the Python C API, get the requested function (identified by "module" and "function" in the texture URI), build the
kwargsto call it with out of the remaining URI parameters, and call it. -
Check the return value, which in this implementation should be a tuple with 4 objects: the width of the image, the height of the image, the number of channels, and a string of the raw image data. Conveniently, PRMan and PIL.Image.tostring interleave the image data exactly the same.
-
Finally, copy bytes from the Python string to the provided pointer when requested.
See PythonRtx.cpp for the majority of the implementation of steps 2 through 5.
The Sticky Parts
Herein lie some small nuggets that I needed to figure out as I went that will make subsequent PRMan/Python projects smoother.
Calling The Plugin
The Rtx docs make no mention whatsoever about how to actually use your plugin. It turns out that you provide a specially formatted string as a texture name to any of the texture functions (e.g. texture, environment, etc.), which looks roughly like:
rtxplugin:YourPluginName?key=value
Swap out YourPluginName for the name of your compiled library (with or without the extension), and append as many key/value pairs to the end using standard URL query string syntax. Note that every key must have a value (designated by =) or PRMan will segfault.
PRman will then search the texture path looking for your library, and the key/value pairs are provided to your plugin as a list of strings via the argc and argv attributes of the texture context.
Resolution Requests Are Not Law
Your plugin may specify to PRMan what the minimum and maximum dimensions you are able to provide, but it does not use these numbers verbatim.
PRMan, unlike some of the other RenderMan-compliant renderers, is very strict about texture dimensions being powers of two (e.g. 512, 1024, etc.), and Rtx plugins are no exception. If you pass "invalid" dimensions to the renderer, it will request "valid" (and therefore different) dimensions from your plugin when filling tile data.
So be careful to either provide power-of-two dimensions, or respect the FillRequest.imgRes.
Python is Not Thread Safe
While Python is able to run in multiple threads, it cannot do so in a concurrent manner due to the global interpreter lock (or GIL).
Unfortunately, this author is not yet well versed enough in the threading mechanics of the interpreter to figure out how to properly capture to GIL when using threads spawned by external code (i.e. PRMan threads).
As such, this plugin sometimes requires you to render with a single thread.
Linear Workflow
Note that the images in the example below are sRGB, and should be linearized before use in a renderer.
Results
It is now straight forward to write a small module to return random photo data from Flickr, the (admittedly unimpressive) results of which may look like:

Take a look at the project on GitHub, and try it out!