Linear RAW Conversions
The first step when using photos in your computer graphics.
Real world photography is a fantastic and easy source of data in computer graphics and visual effects, be it for textures, backgrounds, or light maps. There is one complication that is very easy to overlook, and tricky to get right: linearity.
In real world light transport (and the simulated version of it in our various renderers) the math of light operates in a linear manner. That is, light source A with intensity 1 and light source B with intensity 1 will combine to intensity 2 (in whatever units those numbers are).
However, image capture and display devices do not work in a linear space. This is mostly historical, and maintained for backward compatibility for the content that has been produced in the past, but we must still deal with it to this day. In order to be immediately useful for 99% of cases, non-RAW image formats (as produced by your camera or the RAW converter) have the inverse curve already baked into the image so that they appear similar to the real world when viewed on a display.
It is this curve that must not be applied in order for our photography to be representative of the world (as far as the math is concerned).
I won't get into what "gamma" means, or scene-referred vs. display-referred imagery, so for an in-depth look at linear workflows see Sony Pictures Imageworks' 2012 SIGGRAPH course nodes (PDF) and this FXGuide article.
So how do we get linear output from our DSLR?
Performing the Conversion
There is a fantastic tool called dcraw (installable via your favourite package manager) which allows you to convert from RAW with total control. Want a precise white balance, to ignore bayer-pattern, or a completely linear conversion? This is your tool.
The "secret" is the -4 flag, which outputs linear 16-bit images.
The full process for me (who does not have a Macbeth chart handy) is to establish a white balance, and then do the linear conversion.
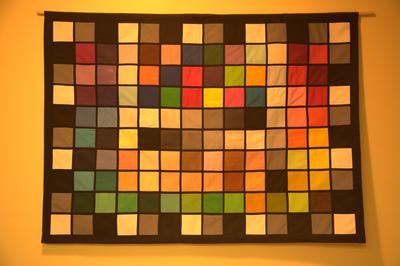
First, perform a basic conversion. I will use a poorly lit photo of my Macbeth tapestry (to maximize satire):
$ dcraw -T -t 0 IMG_9160.CR2
Using your favourite program, find a patch in the image which you would like to be white, and record the top/left and width/height of that region. Now do a white-balanced conversion:
$ dcraw -v -T -A $left $top $width $height IMG_9160.CR2
Loading Canon EOS 5D image from IMG_9160.CR2 ...
Scaling with darkness 128, saturation 3692, and
multipliers 1.171325 1.000000 3.302490 1.000998
AHD interpolation...
Converting to sRGB colorspace...
Writing data to IMG_9160.tiff ...
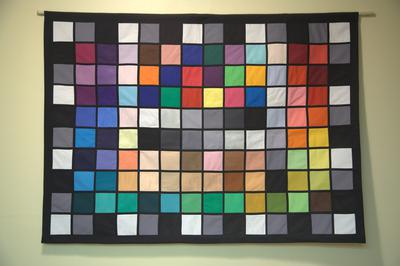
That looks pretty good. The terminal output contains the multipliers dcraw used to attain that white balance. You can use those on other images of the same scene to achieve exactly the same white balance.
Finally, perform the linear conversion:
$ dcraw -T -4 -r 1.171325 1.000000 3.302490 1.000998 IMG_9160.CR2 # Use your own multipliers!

Your final TIFF should be 16-bit and linear with respect to real world values; it is ready for use in your renders!
But how can you know for sure?
Convincing Yourself That it is Linear
In order to verify that your output is absolutely linear, you need to have some source of linearity to measure.
This is easily achieved if you have a calibrated target (such as a real Macbeth chart instead of a decorative tapestry). The patches on the charts have precisely known absolute reflectance values which you can compare your pixel values to. But we only need to have known relative differences, and there is an easy way to generate that without any special equipment.
By taking a series of photos at a range of exposures, we can compare the relative differences from frame to frame to make sure they progress as expected. A photo with twice the exposure time should have pixels twice as bright, and we can assert that they do.
I took a series of 37 images of my tapestry, each 1/3 of a stop apart, ranging from a nearly black frame to a nearly white frame:

I converted them once with Adobe Camera RAW, and once again with the procedure listed above. Using a Photoshop action to do a perspective crop, median filter, and nearest-neighbor resize, I created a series of 14 by 10 images; one pixel per patch on the chart.

Then a Python script loaded the raw values, took their values log-2, and plotted them:
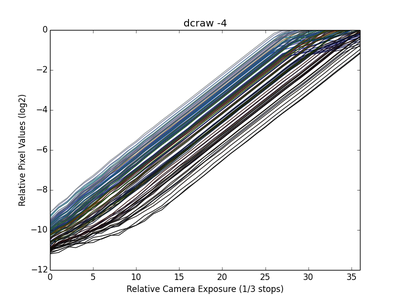

We can see at a glance that the procedure described above does provide a completely linear response (within the limits of noise and colour clipping), and that Adobe Camera RAW bakes in a gamma curve.